
 Help always available here :-
NutriPlanner Zest : Concepts : Entering information
Help always available here :-
NutriPlanner Zest : Concepts : Entering information
On every page that you see within NutriPlanner Zest there will be a combination of various "controls" that enable you to interact with the system or enter information or select from a list of choices. These controls include:
Text boxes
These are areas where you can type in information. They may be quite small, where you are expected to enter a very small piece of information, such as a quantity, or much longer, suitable for a recipe name for example. In these cases, there will be a limit to how much and what you can enter. For example, in a quantity text box you will be expected to enter a number only. In a recipe title box you may be limited to a maximum of 50 characters but you can enter any letter, number or punctuation.
On some pages you will also encounter some multiple line text boxes. In these you can type in anything including a "return" to cause a new line. These boxes typically have no limit to the amount you can enter into them. If you enter more than can fit into the box, some scroll bars will appear allowing you to move up and down the box to access all of the text.
Drop-down select lists
A drop-down select list allows you to choose one option from a number of choices. Initially the drop-down list control looks like this:
![]()
To open the control (to "drop-down" the choices) you will click on the small triangle at the right hand end. It will then show you the options:
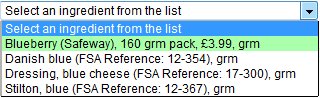
Once it is open you can move your mouse over the options and click on the one you want. The drop-down will then close but display the option you have chosen.
Static select lists
A static select list is similar to a drop-down list in that it allows you to select from a list of options, however the difference is that it is always "open"
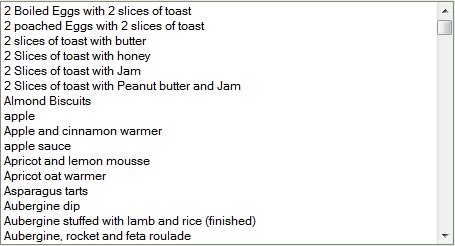
Here the options are laid out for you to point at with your mouse and click to select. If there are more options than will fit in the box there will be a scroll bar to allow you to move up and down to access them.
In a few cases you will be able to select more than one item in a static select list. You do this by clicking on each option you require while holding down the Ctrl key on your keyboard. See the page help for full details of where this is possible.
Radio button sets
A radio button set is a number of small, round buttons that you can click on to select one of the options presented. You are only allowed to have one option selected at a time, so if you click on another one the first one will be cleared.
![]()
In this example, taken from the "My Preferences" page, you can select either format for the display and input of dates.
Checkboxes
A checkbox can either be ticked on not ticked to indicate whether you want that option or not.
![]()
In this example, also taken from the "My Preferences" page, you can select any combination of the Vegan and/or Vegetarian indicators, including neither. In this case both of them are selected. You simply click in the small box to toggle between ticked ornot ticked.
Finally, to conclude this page a word about "read-only" information. If, for example, you open a recipe from the Set cookbook, which you are not allowed to change, the details of the recipe will be shown to you either not in a box at all, just text on the screen, or if it is in a box you will not be allowed to alter its contents.
This concludes the general concepts section of the tutorial. The next page will begin your journey through the Mise-en-place module. If you wish to go to the tutorial of another of the modules, either go to the home page of the Landlord or Trakker modules, or click on the "Introduction" option on the left hand side to return to first page where there is a link to the Finance tutorial.
|
|
|

